Requirements
Before you get started, here are some things you will need to upgrade and label your Protern.io Sensor:
- USB-C cable (the charging cable that came with the sensor will work)
- Fully charged Protern.io Sensor(s)
- Computer running Windows 10 or later
- Download the Protern.io Sensor Updater and latest Protern.io Sensor Firmware
Step 1: Extract and run the Protern Sensor Updater
Note: Windows 10 Defender SmartScreen will provide a warning about running the updater. You will need to click on Run Anyway to use the program.
- Extract the Protern Sensor Updater.zip file
- Navigate to the extracted folder and double click "Updater.bat"
- You will have to ignore the warnings and click on Run Anyway to run the program
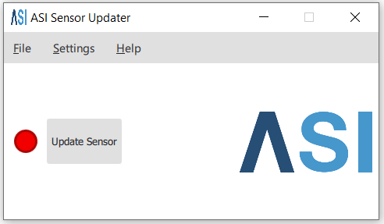
- When the program is running you will see this screen.
Step 2: Upgrade your Protern.io Sensor
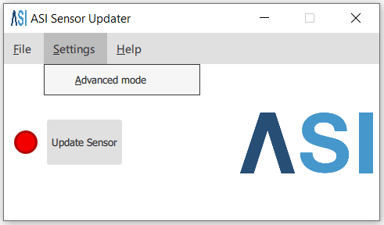
- Click Settings -> Advanced Mode.
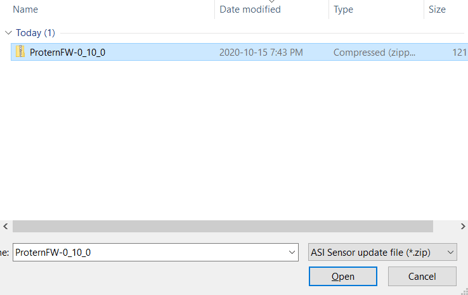
- Find the firmware file you downloaded. On the Protern.io Downloads page you can download the latest Protern.io Sensor firmware.
- Connect the sensor to your PC using the USB cable that came with your sensor.
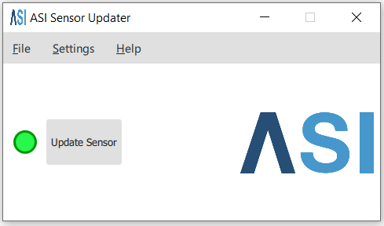
- Blue light will now be blinking slowly on the sensor and the indicator beside “Update Sensor” button will turn green.
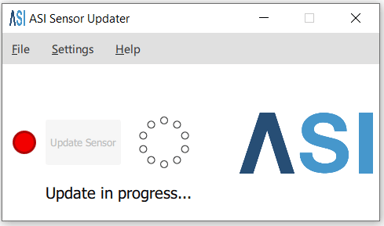
- Click “Update Sensor” Button.
- A message “Update in progress...” will be displayed with a spinning indicator, do not unplug the sensor during the update. This should take approximately 30 seconds
- When complete a dialog will be displayed with the message “The update has been completed successfully”, click “Okay”.
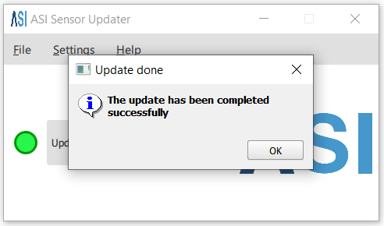
- The sensor firmware has now been updated and the sensor can now be unplugged.
- Repeat for additional sensors.
Note: If the sensor update failed, try again. If it fails a second time, try a different USB port or USB cable. If it still doesn't work, then send a note to support@protern.io .